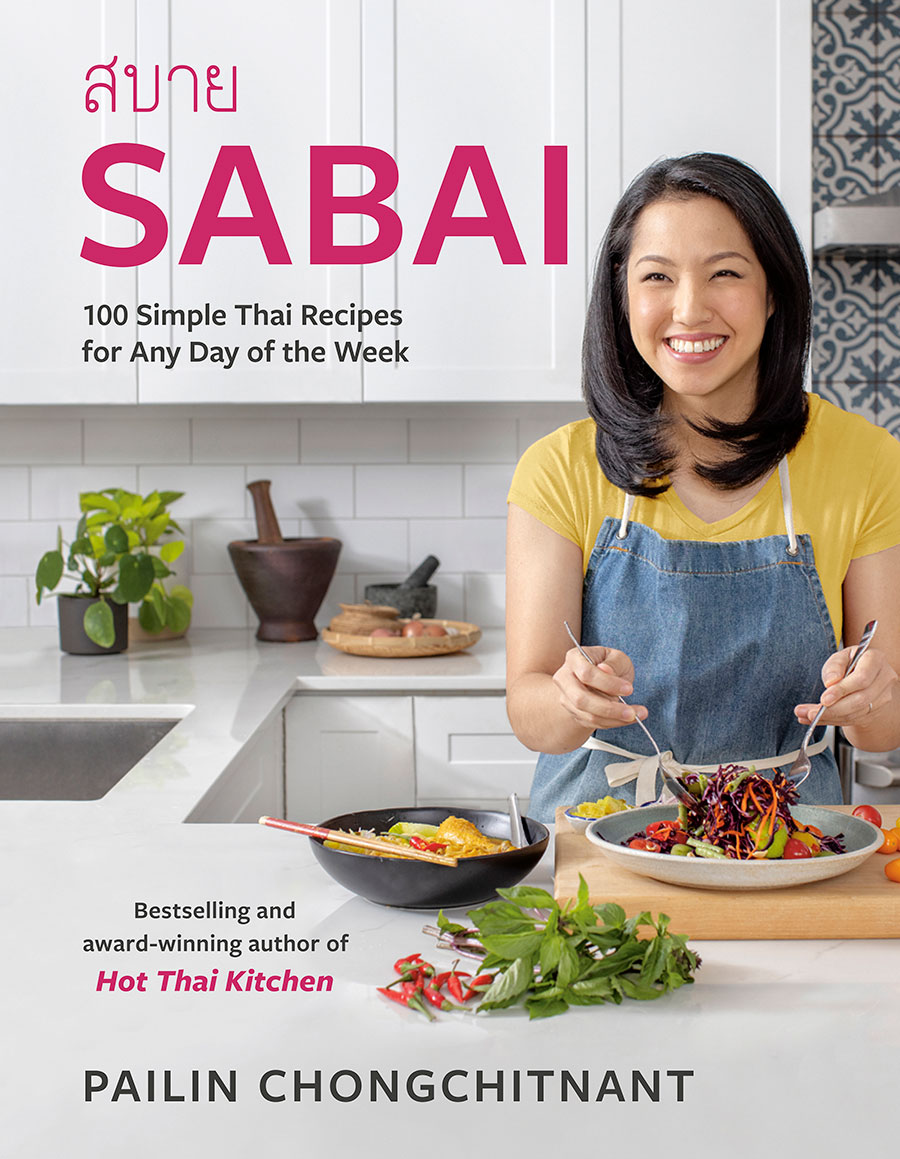
“Sabai, Sabai”: No-Fuss Authentic Thai Recipes From Vancouver Chef Pailin Chongchitnant

Many people are familiar with tom yum goong, which is the famous Thai lemongrass-infused hot and sour soup with shrimp; but the lesser-known chicken version (above) is cleaner tasting and such a soul-soothing soup. Photo: Janis Nicolay
The next time you’re craving Thai food, forget the carry-out. Even if it is a weeknight.
Vancouver chef Pailin Chongchitnant’s cookbook Sabai is chock full of recipes, tips and shortcuts to get authentic Thai food on the table in a hurry. To make things even easier, many of the recipes have QR codes linking to Pailin’s Kitchen, her popular cooking channel on YouTube with millions of views from around the world.
“As a young chef, I used to cook dishes that I wanted to cook regardless of how long they took or how complicated they were,” she told Zoomer. “In 2019, I became a mom, and that quickly changed my priorities! It gave me a whole new appreciation for quick and easy meals, and suddenly I was only interested in things I can do without much fuss.”
Although she got her cooking chops at the Le Cordon Bleu culinary school in San Francisco, the idea for this cookbook is to make dishes from Thailand (where she was born and raised) more accessible to people learning the cuisine for the first time.
“… I wanted to create a resource that would make Thai dishes part of their repertoire of simple, fuss-free meals,” she says.
Which means that even multi-layered dishes like curries and stir-fries don’t require long labour in the kitchen. We share a few of her recipes from the book including Chicken Wing Tom Yum Soup, Leftover Anything Fried Rice, Quick Yellow Curry with Beef and Mushroom & Tofu Holy Basil Stir-Fry.
But first some insider culinary tips from Pailin, which will hopefully make your cooking sabai, sabai — roughly translated from Thai as feeling fine. Or, in Pailin’s words, “easy-peasy,” from prepping to cooking to eating.
Cooking on a Budget: With rising food costs and inflation, many readers are looking for ways to stretch their dollars at the grocery store. Do you have any tips for this and dishes you would recommend?
The most expensive thing on any grocery bill is the meat, so for meat eaters, finding ways to stretch out a small amount of meat in a meal can make a significant impact.
Thai dishes are great for this because in our culture we rarely eat large portions of meat. Our meals are based on rice with lots of veggies and flavourful sauces, and with only a small amount of meat that are like the ‘accents’ of the dish.
Thai curries and stir-fries are great examples of this. You can use just a smaller amount of meat, cut it into bite-sized pieces and bulk the rest up with veggies and serve them with rice. And, the sauces are so flavourful you won’t miss anything. Fried rice, noodle stir-fries and noodle soups are all very filling, and only need a little bit of meat to make them feel complete. There are lots of these recipes in Sabai.
Using eggs as the protein of the meal is also a great way to cut down on meat dollars.
Insider Tips: Can you share your favourite flavour boosters — and any other secret weapons?
Prik nam pla is a Thai condiment made simply from fish sauce, lime juice and some chopped Thai chilies. It’s the go-to flavour booster for all Thai people. For us, if anything feels a little dull tasting, we reach for prik nam pla and it always fixes it! It’s super simple to make and there is a recipe for it in Sabai, of course!
Easy Entertaining: What is your go-to dish for entertaining without the stress?
Massaman curry. Everyone loves it, even those new to Thai food, so I know it is going to be a crowd pleaser. It can be made entirely in advance and even tastes better the next day, so on the day of the party you can just reheat it. It can be made with any kind of meat, plus it can be cooked on the stovetop or in an instant pot, and in Sabai I provide methods for both. It doesn’t require any special technique, is gluten-free and is not too spicy… it’s just the perfect dish for entertaining!
Must-Haves: What items/ingredients do you keep stocked in your pantry and fridge?
I always keep homemade pork stock or chicken stock in the freezer. Homemade stock (or bone broths as some call them) is just so much tastier and more nutritious than store-bought broths. I make it in an instant pot so it’s totally no-fuss. I reach for it to make soups for my son often, not to mention I can have comforting noodle soups for dinner in a pinch.
I also keep ground pork in the freezer because it is so versatile, especially in Thai cuisine. I make meatballs, stir-fries, lettuce wraps and even noodle salads. It doesn’t have a strong flavour like ground beef, which makes it easier to incorporate into any dish. And it is cheaper! When all else fails, I just add it to pre-made tomato sauce for a satisfying pasta dinner. I keep it frozen in a flat disc, which makes it very quick to thaw so I don’t need to plan ahead.
Finding Comfort: What is your go-to comfort food dish?
Chicken tom yum soup [recipe below]. Many people are familiar with tom yum goong, which is the famous Thai lemongrass-infused hot and sour soup with shrimp. But the lesser-known chicken version is cleaner tasting and such a soul-soothing soup. In Sabai I have a version made from chicken drumettes. Drumettes are my secret weapon for chicken soup; they have a lot of bones and cartilage that yield an incredibly rich, nourishing broth without the need for any stock.
Snack Attack: What is your favourite snack, healthy and otherwise?
I am a snack monster and could live on snacks alone. I love trying out new flavours of potato chips and other crunchy snacks, which you can always find at Asian grocery stores because countries in Asia are constantly coming out with new (and weird) chips flavours. When I’m feeling refined, I’ll reach for crackers, comté cheese and a glass of white wine.
Multigenerational: Favourite dishes to cook with the kids?
I love making pancakes or waffles with my 4-year-old son. He is so delighted when I open the waffle machine to reveal the finished product, and it’s just wonderful to watch. For pancakes, he will request that I draw various things on them, which I do by putting chocolate batter in a squeeze bottle, drawing the design on the pan and then covering it with the regular batter. The first flip is the exciting reveal of the drawing.

RECIPES
Leftover Anything Fried Rice
Kao Pad Kong Leua | ข้าวผัดของเหลือ
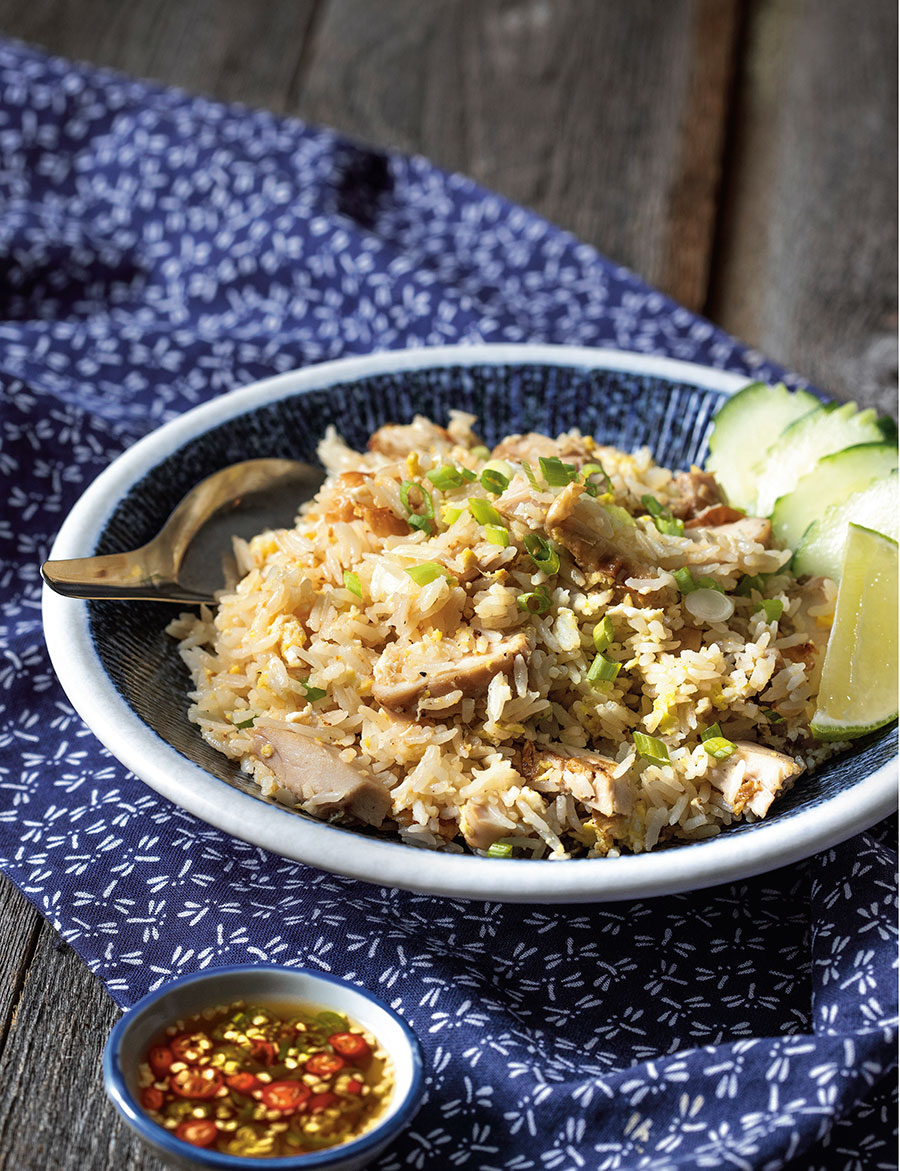
Fried rice is for Thai people what pizza is for North Americans: a standard base that you can then top with just about anything, making it the ideal dish for using up leftover bits of meat and veg. But unlike pizza, fried rice is easy and fast to make! A basic fried rice recipe such as this one is a good tool to have in your back pocket, and it will work with any protein, even strongly flavored ones. We don’t usually add veggies to our basic fried rice, but to serve it Thai style, you’ve got to have fresh cucumber slices, a lime wedge, and some prik nam pla on the side!
Serves: 2
Cooking Time: 5 minutes
Ingredients:
2 tablespoons (30 ml) neutral oil
6 cloves (30 g) garlic, chopped
2 large eggs
2½ cups (375 g) cooked jasmine rice (see below)
1 tablespoon (15 ml) soy sauce, preferably Thai (use a bit less if your leftovers are salty)
2 teaspoons (10 ml) fish sauce
1 teaspoon (5 ml) granulated sugar
¼ teaspoon (1 ml) ground white pepper
4.6 ounces (130 g) leftover protein, shredded or chopped
1 green onion and/or 4 to 6 sprigs cilantro, chopped
Instructions:
- Place a wok on medium heat and add the oil and garlic. Once the garlic bubbles, stir for 1 to 2 minutes, until the smallest pieces start to turn golden.
- Add the eggs, scramble slightly, then let them set about halfway before stirring to break up the pieces.
- Turn the heat up to high, then add the rice, soy sauce, fish sauce, sugar, and pepper; toss to distribute the sauce evenly.
- Add the protein and toss to mix, then let the rice sit without stirring for 10 to 15 seconds so that it can toast and develop some browning and flavor. Toss to mix and repeat this toasting step a few more times. Turn off the heat, then taste and adjust the seasoning.
- Toss in the green onions and/or cilantro to taste, then plate and garnish with more fresh herbs, if desired. Serve with cucumber slices, lime wedges, and some prik nam pla, if you wish.
For serving:
English cucumber slices Lime wedges
Prik nam pla (Fish Sauce & Chilies Condiment)
Use Those Drippings:
I first used this recipe with leftover supermarket rotisserie chicken, and if you’ve ever had rotisserie chicken, you’ll know that at the bottom of the container lie delicious chicken juices. And the same might be true with whatever leftover meats you have — drippings or juices sitting at the bottom of the plate. This is liquid gold that should absolutely go into your fried rice. However, be mindful of how salty the liquid is, and cut down on the soy sauce or fish sauce accordingly. Also, don’t add more than 2 to 3 tablespoons (30 to 45 ml) liquid for this recipe, so as to not make it too wet.
A Few Tips for the Perfect Fried Rice:
Old, cold rice for fried rice is great, but you don’t need it. If cooking fresh rice, wash the rice at least three times, until the water runs clear, then use a little bit less water to cook it than you normally would (I do a one-to-one ratio for jasmine rice). If you have time, spread the rice out onto a plate to let it dry out before cooking. I also recommend weighing the cooked rice for accuracy, but if measuring by cup, press the rice in just enough so there aren’t any big gaps, but do not pack it tightly. Finally, if you don’t have a large wok, I recommend cooking in two batches to maximize rice toasting, though you can cook all the protein at once.
Quick Yellow Curry with Beef
Gaeng Garee Neua | แกงกะหรี่เนื้อ
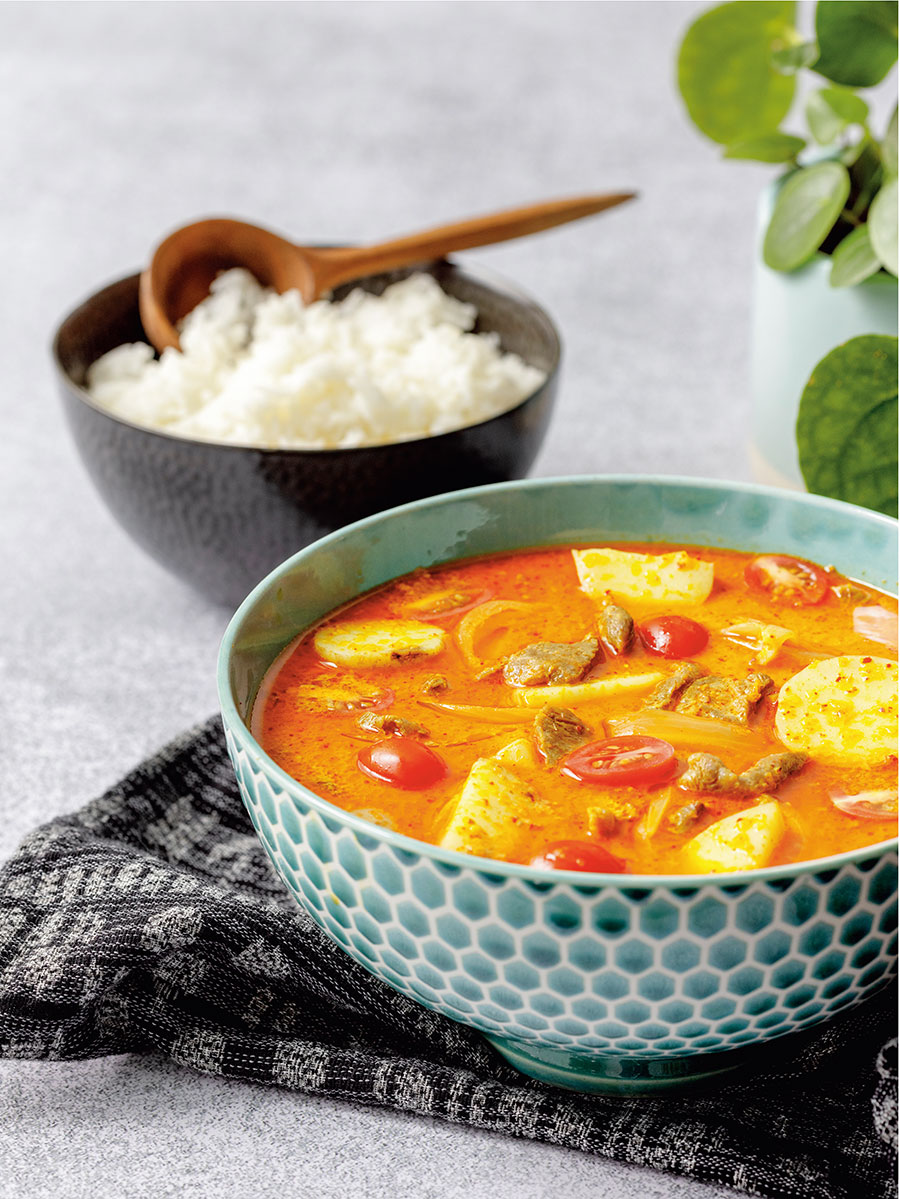
For years I thought of beef curry as a dish that required simmering chunks of stew beef for hours until tender. But for a weeknight, I wondered if there was a way to do it quickly and without a pressure cooker. Then I remembered my days working at a quick-service Thai restaurant, where we churned out pots of fork-tender beef curry in 45 minutes. The secret was using thinly sliced beef and choosing a flavorful but not-too-tough cut so it would not take a long time to tenderize. The restaurant used flank, which was great but a little lean for my liking. I found chuck top blade to be the perfect choice in terms of flavor and fat content, and it only takes about 20 minutes of simmering to become fork-tender.
Serves: 4
Cooking Time: 45 minutes
Ingredients:
1½ pounds (675 g) chuck top blade steak(see note)
1 teaspoon (5 ml) table salt
5 to 6 tablespoons (75 to 90 ml) yellow curry paste, store-bought or homemade (p. 257), divided
2 cups (500 ml) coconut milk, divided
1½ tablespoons (18 g) finely chopped palm sugar, packed
1 to 2 tablespoons (15 to 30 ml) fish sauce 1 tablespoon (15 ml) tamarind paste, store-bought or homemade (p. 266) (see note)
10.5 ounces (300 g) waxy potatoes, such as new or red-skinned potatoes, cut into 1½-inch chunks
½ medium (120 g) yellow onion, julienned
¾ cup (100 g) halved cherry tomatoes Jasmine rice, for serving
Instructions:
- Slice the steak into 1/8-inch (3 mm) pieces, removing any silver skin on the exterior (the little strip of connective tissue running through the middle of the steak is fine to leave).
- Place the beef in a medium pot and add just enough water to sub- merge it. Add the salt and 1 tablespoon (15 ml) curry paste and stir to mix; bring to a simmer over high heat. Turn the heat down to low and simmer for 20 to 25 minutes, until fork-tender. The timing will vary if you use a different cut of meat. Skim off any scum that floats to the top.
- While the beef cooks, make the curry sauce. In a medium pot, bring ¾ cup (185 ml) coconut milk to a boil over medium-high heat, then add the remaining curry paste and stir to mix well. Turn the heat down to medium and stir frequently until the mixture is very thick and the coconut oil separates from the paste, about 5 minutes (the oil may not separate depending on the coconut milk you’re using; this is okay).
- Add the remaining coconut milk, sugar, 1 tablespoon (15 ml) fish sauce, and the tamarind paste to the curry. Stir to mix, then bring to a boil over medium-high heat.
Do-ahead: The whole curry can be made up to 3 days in advance and reheated. If reheating, be sure to not overcook the potatoes—or add them when serving.
Notes: If you can’t find chuck top blade, you can choose other cuts of beef that are flavourful but not too tough. Most inexpensive steaks sold for marinating and grilling fit this bill, and if possible, choose one that is not too lean. If you have time to cook, you can choose any stewing beef and increase the cooking time accordingly.
If you don’t have tamarind paste, no need to buy or make it just for this recipe. We just need a little bit of acid to brighten up the sauce, so a few dashes of Worcestershire sauce or a squeeze of lime at the end will also do.
Homemade Tamarind Paste
Nam Makaam Piak | น้ำมะขามเปียก
I grew up making tamarind paste at home fresh whenever we needed some. When I came to Canada, I was over-the-moon excited at the convenient pre-made jars you can buy. But I was quickly disappointed, as that paste can be quite diluted and barely sour, and I needed to use so much of it to get good flavour. So I’m going back to basics here.
Homemade tamarind paste is packed with acidity and flavour, not to mention that it’s easy and costs you much less than store-bought. You can keep the paste in mason jars—it will keep for many months in the fridge—or freeze it into ice cubes and it’ll last indefinitely.
Makes: About 2 cups (500 ml )
Cooking Time: 20 minutes plus 20 minutes soaking
Ingredients:
½ pound (225 g) seedless tamarind pulp (see note below)
2 cups (500 ml) hot water
Instructions:
- Use your hands to pull apart the tamarind block into small chunks and place them in a large, heatproof mixing bowl.
- Pour the hot water over the tamarind and let it sit until it’s cool enough for you to handle, at least 20 minutes. You can let it sit for as long as you need at this point—the longer it sits, the easier the next step will be.
- Use your hand, preferably gloved if you don’t want tamarind stuck in your nails, to squeeze and scrunch the pulp to loosen it from the fibres. You should end up with something that has the consistency of a smoothie.
- Once you can feel that most of the pulp has been released from the fibres, strain the tamarind mixture into a pot through a sieve, but avoid a fine-mesh sieve, as the paste will be thick (Asian noodle strainers work great for this). Push as much of the liquid through as possible, and scrape the bottom of the sieve occasionally.
- Gradually pour about ½ cup (125 ml) room temperature water over the remaining fibres in the sieve while using your hand to mix it all around. This will rinse off any last little bit of tamarind still stuck in the fibres.
- You can use the tamarind paste right away for cooking, but for storage, cook it over medium-high heat until it boils, stirring constantly, because it is quite thick and can bubble and jump at you if you don’t stir. Allow it to bubble for 4 to 5 minutes to ensure that it is thoroughly heated through before turning off the heat.
- Transfer the hot tamarind paste to clean 1-cup (250 ml) mason jars.
- I like using the smaller ones so each jar will not be open for as long. Close the lids while the paste is still hot and let cool at room temperature before moving to the fridge for storage. You can also freeze the paste in ice cube trays and then store the cubes in freezer bags.
Yellow Curry Paste
Prik Gaeng Garee | พริกแกงกะหรี่
The yellow in yellow curry comes from the fresh turmeric and the small amount of ground turmeric in the curry powder. You can use any kind of curry powder that you like here; the generic one commonly available at a non-Asian grocery store is fine. My rule of thumb when it comes to choosing curry powder is that if it smells good to you, it’ll work. I do, however, prefer using fresh turmeric instead of ground, as I find the flavour smoother, and it is too easy to overdo it with the powder. Turmeric adds a unique flavour unlike any other spice, but too much, whether fresh or ground, will give an unpleasant medicinal taste. So treat it as one of those you-can-always-add- more-later-if-needed ingredients!
Makes: About 2/3 cup (160 ml ), for two batches of 4-serving curry
Ingredients:
0.7 ounce (20 g) mild dried red chilies, cut in ½-inch (1.2 cm) chunks
1 tablespoon (15 ml) coriander seeds, toasted 1½ teaspoons (7 ml) cumin seeds, toasted
½ teaspoon (2 ml) white peppercorns 1 teaspoon (5 ml) table salt
1 stalk lemongrass, bottom half only, finely sliced
2 tablespoons (15 g) chopped ginger
2 tablespoons (15 g) chopped galangal
1 tablespoon (8 g) chopped turmeric, or
½ teaspoon (2 ml) ground turmeric
6 cloves (30 g) garlic, chopped
½ cup (70 g) chopped shallots
1 tablespoon (15 ml) curry powder
2 teaspoons (10 ml) fermented shrimp paste (optional)
Instructions:
- Using a coffee grinder, grind the dried chilies, coriander seeds, cumin seeds, peppercorns, and salt into a fine powder.
- If using a heavy-duty mortar and pestle, add the lemongrass, ginger, galangal, and fresh turmeric, and pound into a fine paste. Add the garlic and shallots, and pound into a fine paste. Add the ground chili mixture and pound until well combined. Add the curry powder, ground turmeric, and shrimp paste; pound to mix.
- If using an immersion blender, place the lemongrass, ginger, galangal, and turmeric in a narrow container, such as a glass measuring cup.
- Then top it off with the garlic, shallots, and shrimp paste (it is easier to blend with the moister ingredients on top). Use the immersion blender to blend everything until fine. You will need to lift and reposition the blender several times, stopping to scrape the bottom and bringing it to the top halfway through. Once the mixture is fine, add the ground chili mixture, curry powder, and ground turmeric, and blend to mix.
- Use right away, store in the fridge for up to 3 days, or divide into two portions and freeze for up to a few months.
Chicken Wing Tom Yum Soup
Tom Yum Peek Gai | ต้มยำปีกไก่
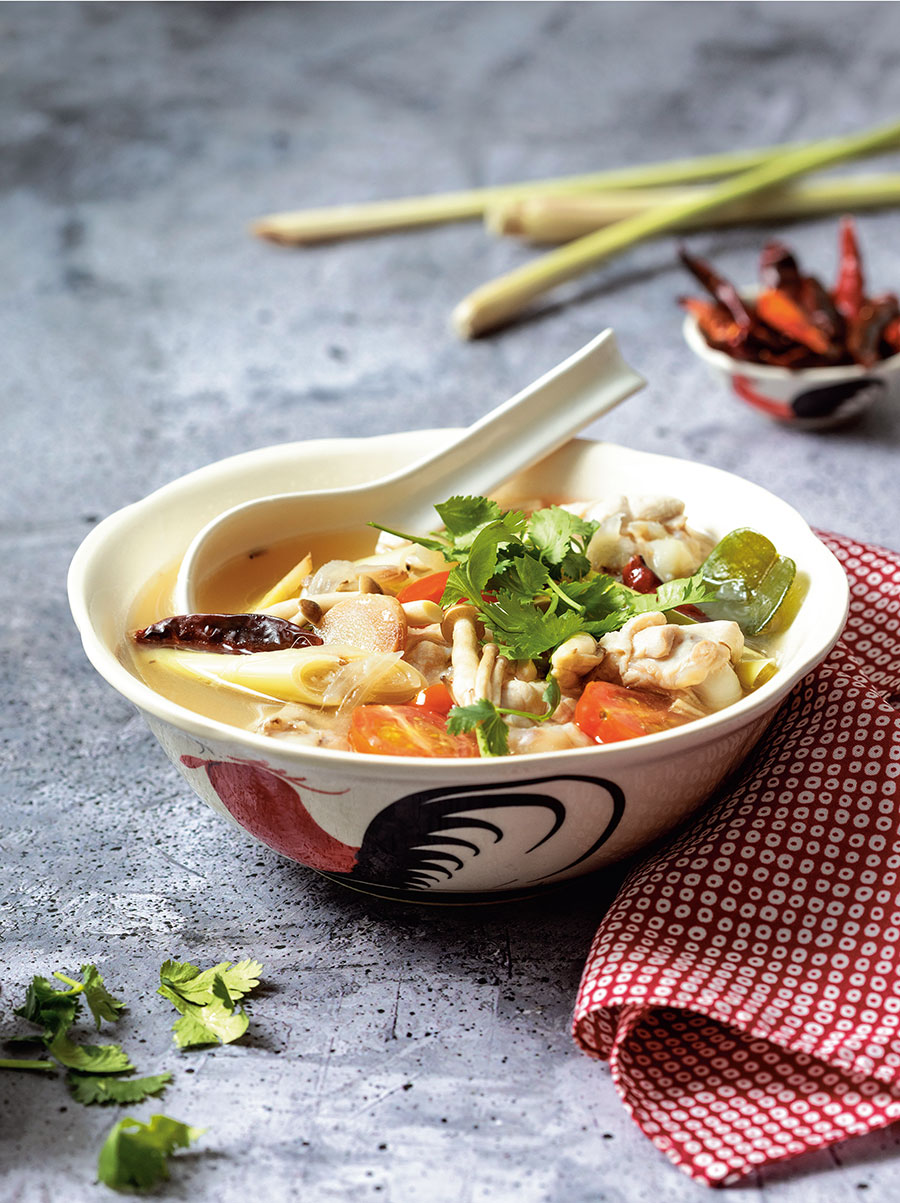
Tom yum soup can be made with any kind of meat or seafood, but the version with shrimp is the most popular outside Thailand, probably because it has an intense, rich flavor thanks to the Thai chili paste. The chicken version, however, has a simpler, cleaner-tasting broth, and it is one of the most soul-soothing dishes we have to offer. You can use boneless chicken, but I love using chicken wings in this because they have an extremely high bone-to-meat ratio, which means that in 20 minutes the wings will turn plain water into chicken stock that’s richer and tastier than any stock you can buy. Wings also don’t require any chopping, and I’m all about less cleanup any time!
Serves: 4
Cooking Time: 30 minutes
Ingredients:
5 cups (1.25 l) water
1½ pounds (675 g) chicken drumettes (see note)
½ cup (60 g) coarsely chopped shallots
3 to 4 tablespoons (45 to 60 ml) fish sauce
2 to 3 teaspoons (10 to 15 ml) granulated sugar
5 spicy dried chilies, such as Thai chilies or chiles de árbol, or more to taste (see note)
2 stalks lemongrass, bottom halves only, smashed and cut in 2-inch (5 cm) pieces
10 thin slices (25 g) galangal 10 makrut lime leaves
3.5 ounces (100 g) shimeji or oyster mushrooms
1½ cups (200 g) halved cherry tomatoes 3 to 4 tablespoons (45 to 60 ml) lime juice
7 to 8 sprigs cilantro, chopped Jasmine rice, for serving
Instructions:
- Bring the water to a boil in a large pot over high heat. Add the chicken drumettes, shallots, 3 tablespoons (45 ml) fish sauce and 2 teaspoons (10 ml) sugar. Simmer for about 20 minutes, until the chicken is fork-tender.
- While the chicken is cooking, char the dried chilies for additional smoky flavor. Place the chilies in a dry skillet over medium-high heat and stir them for a few minutes, until they develop charred spots and smell smoky. Keep an eye on them and don’t walk away! Once charred, set aside.
- When the chicken is tender, add the dried chilies (keep them whole for a milder soup, break them up for a spicy soup), lemongrass, galangal, and mushrooms. Twist the makrut lime leaves to bruise them and release their aroma before tearing them into big chunks and adding to the pot, discarding any big center stems. Simmer for 5 to 7 minutes.
- Add the tomatoes and cook for about 2 minutes, or just until the tomatoes are soft but still hold their shape. Turn off the heat and stir in 3 tablespoons (45 ml) lime juice. Taste and adjust the seasoning with more fish sauce, sugar, or lime juice as needed. You want it to lead with sour and salty. The sweetness is there for balance, but the soup should not taste distinctly sweet. Before serving, you can remove the herbs, as they are not meant to be eaten, though they are tradi- tionally left in the soup. I like to remove only half to make it a little easier to eat while keeping the traditional look. Be sure to remind your guests not to eat them!
- Garnish the soup with cilantro and serve with jasmine rice. The meat should be super tender and easy to pry off the bones with a spoon.
Note: Drumettes are easier to eat in soups than whole wings.
Mushroom & Tofu Holy Basil Stir-Fry
Taohu Pad Gaprao | เต้าหู้ผัดกะเพรา
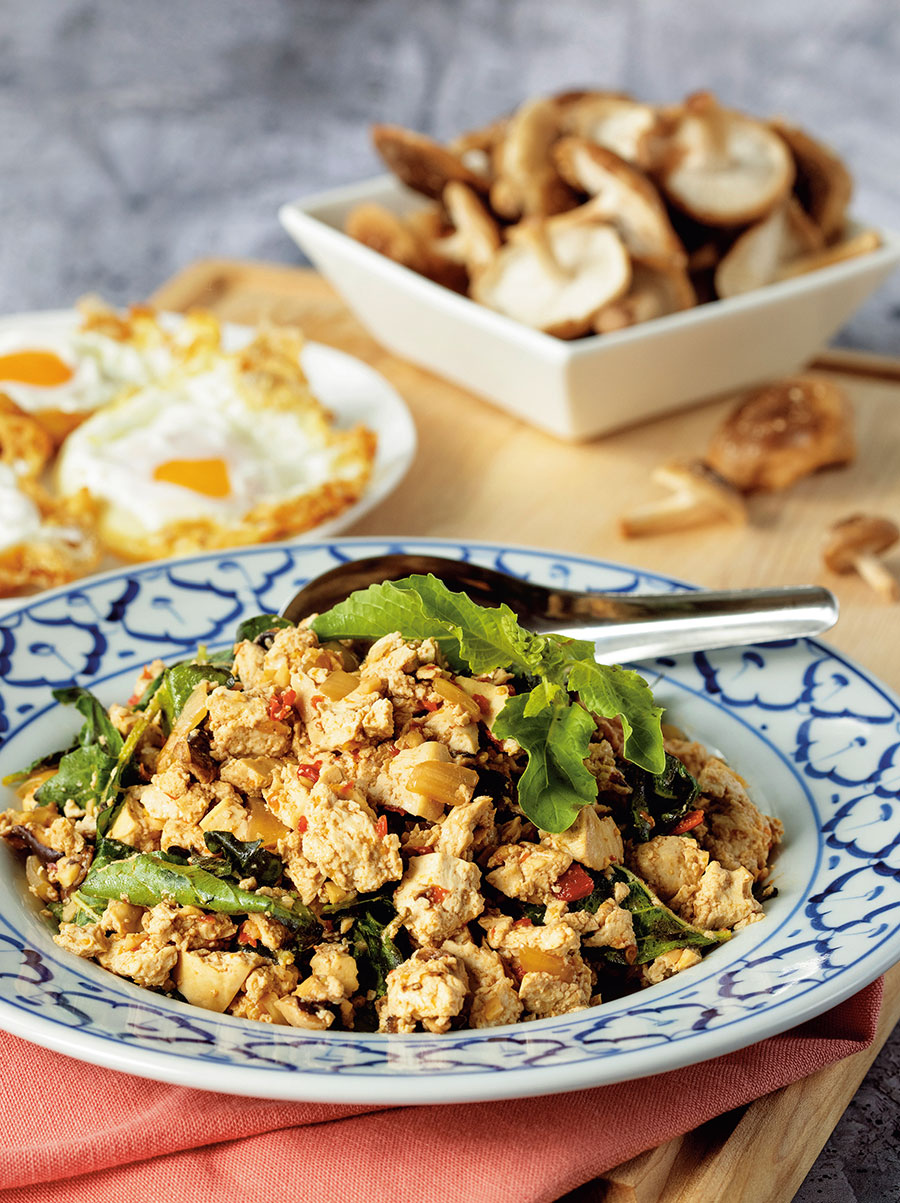
This vegan version of the ever so popular pad gaprao was an instant hit when I first made it. My unsuspecting carnivorous husband devoured it, and was surprised when I told him it was vegan. (Not even a drop of fish sauce??) Put it on top of hot jasmine rice and it’s really all you need for a simple meal, but if you eat eggs, try serving it with a runny fried egg, the way we love to do it in Thailand.
Serves: 4
Cooking Time: 20 minutes, plus 5 to 10 minutes if frying eggs
Ingredients:
12 ounces (340 g) extra firm tofu, drained 4 ounces (120 g) fresh shiitake mushrooms 2 to 3 Thai chilies, or as many as you can handle
1/3 cup (40 g) chopped mild red peppers
7 cloves (35 g) garlic
2 tablespoons (30 ml) soy sauce
2 teaspoons (10 ml) Thai seasoning sauce
½ to 1 teaspoon (2 to 5 ml) black or dark soy sauce (optional)
Oil for frying eggs (optional)
4 eggs (optional, see note)
2 tablespoons (30 ml) neutral oil
¼ large (50 g) yellow onion, diced
2 teaspoons (10 ml) granulated sugar
1½ cups (20 g) holy basil or Italian basil leaves Jasmine rice, for serving
Instructions:
- Crumble the tofu with your hands into rough chunks that resemble cooked ground meat, then place them on a paper towel–lined plate to absorb excess moisture.
- If the shiitake mushrooms have thick stems, cut them off, then slice the caps into ¼-inch (6 mm) slices.
- Using a mortar and pestle, pound the Thai chilies until fine, then add the mild red peppers and garlic and pound into a rough paste.
- Make the sauce in a small bowl by combining the soy sauce, seasoning sauce, and ½ teaspoon (2 ml) black soy sauce.
- If you’re making fried eggs, make them now.
- Place a wok on medium heat and add the oil and garlic-chili paste. Once the garlic is bubbling, keep stirring for about 2 minutes, until aromatic and the garlic starts to turn golden.
- Add the onions and mushrooms, then turn the heat up to high and cook for 1 minute, until the mushrooms are wilted. Add the tofu, sauce, and sugar, then toss for 2 to 3 minutes, until any pooling liquid in the pan has dried up. If you want a darker colour, add a little more black soy sauce.
- Turn off the heat and add the basil, tossing just until wilted. Taste and adjust the seasoning with soy sauce and sugar as needed.
- Plate and serve with jasmine rice. If serving as a one-dish meal, place the rice on a plate, spoon the tofu over it, and top everything with the fried egg.
Note: Pad gaprao is typically paired with a fried egg when served as a one-dish meal. If serving as part of a multi-dish Thai meal, you can omit the egg.
More Than Just Heat: I usually say you can make things as spicy as you want, but for the real pad gaprao experience, you should make it as spicy as you can handle! But it’s not just about the heat, as chilies also provide flavour that’s important to this dish. This is why we use mild and hot chilies; the mild ones add the needed chili flavor without making the dish too spicy. Red bell pepper will work, but preferably something smaller and less watery. The seeds and pith can be removed to reduce heat.
Excerpted from Sabai by Pailin Chongchitnant. Copyright © 2023 Pailin Chongchitnant. Photographs by Janis Nicolay. Published by Appetite by Random House®, a division of Penguin Random House Canada Limited. Reproduced by arrangement with the Publisher. All rights reserved.
RELATED:
A Taste of Thailand: A Recipe for Grilled Turkey Satay Skewers From Celebrated Chef Nuit Regular
‘Baking Wisdom’: Recipes and Tips From Canadian Pastry Chef Anna Olson
4 Family-Style Recipes From Celebrated Chefs Lynn Crawford and Lora Kirk
'%3E %3Cg id='Group'%3E %3Cpath id='Vector_2' d='M12.4876 13.8996V13.4213H0.743091V15.2149H9.18805L9.22196 15.2685C9.19653 15.2272 3.24373 25.2836 0.74521 29.5469C0.420975 30.1015 0.0797856 30.7158 0.0797856 30.7158C0.0713089 30.7323 0.0585938 30.755 0.0585938 30.755H12.1401V28.9614H3.67181L3.6379 28.9078C3.37512 29.1222 12.4876 13.8996 12.4876 13.8996ZM36.1229 22.115C36.1229 26.4896 33.7537 29.18 31.1683 29.18C28.5829 29.18 26.1861 26.4896 26.1861 22.115C26.1861 17.7403 28.5553 15.0231 31.1683 15.0231C33.7812 15.0231 36.1229 17.7403 36.1229 22.115ZM22.0155 22.115C22.0155 26.4896 19.6462 29.18 17.0587 29.18C14.4712 29.18 12.0765 26.4896 12.0765 22.115C12.0765 17.7403 14.4458 15.0231 17.0587 15.0231C19.6717 15.0231 22.0155 17.7403 22.0155 22.115ZM38.223 22.0613C38.223 16.7095 35.0443 13.1492 31.1661 13.1492C27.288 13.1492 24.3402 16.4312 24.0987 21.4326C23.8592 16.4333 20.7842 13.1492 17.0587 13.1492C13.3332 13.1492 9.97427 16.7074 9.97427 22.0613C9.97427 27.4153 13.1785 31.0003 17.0587 31.0003C20.9389 31.0003 23.8592 27.7183 24.0987 22.6922C24.3402 27.7162 27.4406 31.0003 31.1661 31.0003C34.8917 31.0003 38.223 27.4421 38.223 22.0613ZM51.3747 30.755H53.5257L52.3178 13.4213H50.1668L45.797 27.3328L41.4273 13.4213H39.2763L38.0662 30.755H40.2172L41.0352 19.0247L44.7205 30.755H46.8714L50.5567 19.0247L51.3747 30.755ZM53.9453 30.755H62.3797V28.9614H56.0963V22.9293H60.964V21.1357H56.0963V15.2128H61.8859V13.4192H53.9453V30.7529V30.755ZM69.3624 18.2021C69.3624 20.1029 68.1333 21.1625 66.7367 21.1625H64.893V15.2128H66.7092C68.1333 15.2128 69.3624 16.3261 69.3624 18.2021ZM71.5134 18.1753C71.5134 15.2128 69.3348 13.4213 67.0164 13.4213H62.7993V30.755H64.893V22.9313H66.7092L71.5112 30.755H73.997L68.8601 22.4695C70.369 21.8717 71.5134 20.3502 71.5134 18.1773' fill='%23231F20'/%3E %3C/g%3E %3C/g%3E %3C/g%3E %3Cg id='Group_2'%3E %3Cpath id='Vector_3' d='M9.67285 8.56629V3.50513H12.6249V4.11535H10.5947V5.71719H12.2943V6.32742H10.5947V7.954H12.9046V8.56423H9.67285V8.56629Z' fill='%23231F20'/%3E %3Cpath id='Vector_4' d='M17.6819 8.6137H17.2581L15.1855 3.50513H16.1392L17.0822 5.86975C17.2178 6.20991 17.362 6.63872 17.4976 7.05103H17.5188C17.6544 6.64696 17.7879 6.2264 17.9341 5.86975L18.8666 3.50513H19.7482L17.6862 8.6137H17.6819Z' fill='%23231F20'/%3E %3Cpath id='Vector_5' d='M22.4072 8.56629V3.50513H25.3593V4.11535H23.3291V5.71719H25.0287V6.32742H23.3291V7.954H25.639V8.56423H22.4072V8.56629Z' fill='%23231F20'/%3E %3Cpath id='Vector_6' d='M31.6164 8.56629L29.9698 6.32123H29.2959V8.56629H28.374V3.50513H30.0948C30.9552 3.50513 31.805 4.01227 31.805 4.90906C31.805 5.54402 31.3896 5.97283 30.8725 6.16249L32.6654 8.56629H31.6185H31.6164ZM29.9592 4.10711H29.2959V5.71719H29.9592C30.436 5.71719 30.8704 5.43888 30.8704 4.90906C30.8704 4.37923 30.436 4.10711 29.9592 4.10711Z' fill='%23231F20'/%3E %3Cpath id='Vector_7' d='M37.5849 6.27382V8.56629H36.6737V6.28206L34.6943 3.50513H35.667L36.6503 4.90081C36.8156 5.13789 37.0021 5.38528 37.1378 5.59968H37.159C37.3031 5.39353 37.5001 5.11522 37.657 4.90081L38.6403 3.50513H39.5621L37.5828 6.27382H37.5849Z' fill='%23231F20'/%3E %3Cpath id='Vector_8' d='M44.3084 4.11535V8.56629H43.376V4.11535H41.7188V3.50513H45.9656V4.11535H44.3084Z' fill='%23231F20'/%3E %3Cpath id='Vector_9' d='M52.0484 8.56629V6.32948H49.499V8.56629H48.5771V3.50513H49.499V5.71926H52.0484V3.50513H52.9808V8.56629H52.0484Z' fill='%23231F20'/%3E %3Cpath id='Vector_10' d='M56.2129 8.56629V3.50513H57.1453V8.56629H56.2129Z' fill='%23231F20'/%3E %3Cpath id='Vector_11' d='M64.7402 8.64463L62.4091 6.17693C62.0467 5.79553 61.6208 5.31106 61.2796 4.91524L61.2584 4.92349C61.2796 5.3523 61.2902 5.7811 61.2902 6.13776V8.56629H60.3789V3.50513H61.0316L63.1868 5.82233C63.4878 6.14806 63.9222 6.63872 64.2337 7.00362L64.2549 6.99537C64.2337 6.62223 64.2231 6.17899 64.2231 5.83677V3.50513H65.1344V8.64669H64.7402V8.64463Z' fill='%23231F20'/%3E %3Cpath id='Vector_12' d='M70.9048 8.64416C69.4235 8.64416 68.0566 7.69172 68.0566 6.03421C68.0566 4.37671 69.4659 3.41602 70.8752 3.41602C71.5999 3.41602 72.17 3.57476 72.5324 3.78091L72.3883 4.42412C72.0471 4.21797 71.5491 4.05098 71.0002 4.05098C69.9639 4.05098 68.9912 4.77253 68.9912 6.04246C68.9912 7.31239 69.9448 8.01745 70.9599 8.01745C71.405 8.01745 71.7567 7.93911 71.975 7.7948V6.61352H70.8349V6.03421H72.8354V8.12877C72.3586 8.47718 71.7271 8.64416 70.9091 8.64416H70.9048Z' fill='%23231F20'/%3E %3C/g%3E %3Cpath id='Vector_13' d='M0.0839844 1.00212L73.997 1' stroke='%23231F20' stroke-width='1.25' stroke-miterlimit='10'/%3E %3Cpath id='Vector_14' d='M0.0839844 10.9116H73.997' stroke='%23231F20' stroke-width='1.25' stroke-miterlimit='10'/%3E %3Cpath id='Vector_15' d='M4.91016 4.15649L3.55812 4.13794L5.18777 5.7068L0 5.6532V6.5974L5.20049 6.651L3.61321 8.18068L4.96526 8.19718L7.0018 6.20157L4.91016 4.15649Z' fill='%23D71920'/%3E %3C/g%3E %3C/svg%3E)
